Hardware Setup
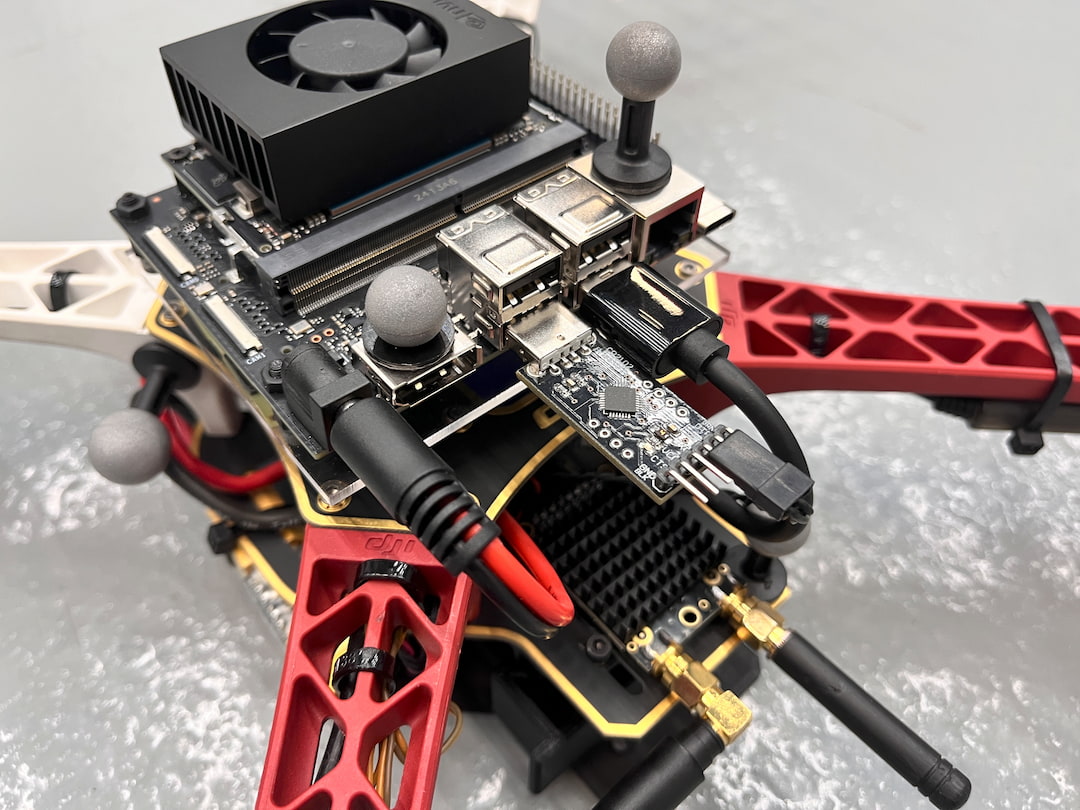
VSLAM UAV is supported on a PX4 (v1.15.4) flight controller, Intel D435i camera, and a Jetson Orin Nano (JetPack 6.2) companion computer.
If you haven't already done so, please install JetPack 6.2 for the Jetson Orin Nano using the Getting Started Guide.
Jetson Orin Nano Setup
Wiring
This tutorial uses the flight controller's TELEM2 port to communicate with the companion computer.
The Jetson Orin Nano should theoretically be able to communicate with the flight controller via the GPIO pins. However upon testing, the Jetson Orin Nano struggles to communicate with the flight controller due to a possibly noisy data link. I would recommend using a USB to UART adapter to communicate with the flight controller.
Connect the flight controller's TELEM2 TX/RX pins to the complementary RXD/TXD pins on the USB to UART adapter:
| PX4 TELEM2 Pin | USB To UART Adapter Pin |
|---|---|
| UART5_TX (2) | RXD |
| UART5_RX (3) | TXD |
The standard TELEM2 pin assignments are shown below:
| Pins | Signal | Voltage |
|---|---|---|
| 1 (Red) | VCC (out) | +5V |
| 2 (Black) | UART5_TX (out) | +3.3V |
| 3 (Black) | UART5_RX (in) | +3.3V |
| 4 (Black) | UART5_CTS (out) | +3.3V |
| 5 (Black) | UART5_RTS (in) | +3.3V |
| 6 (Black) | GND | GND |
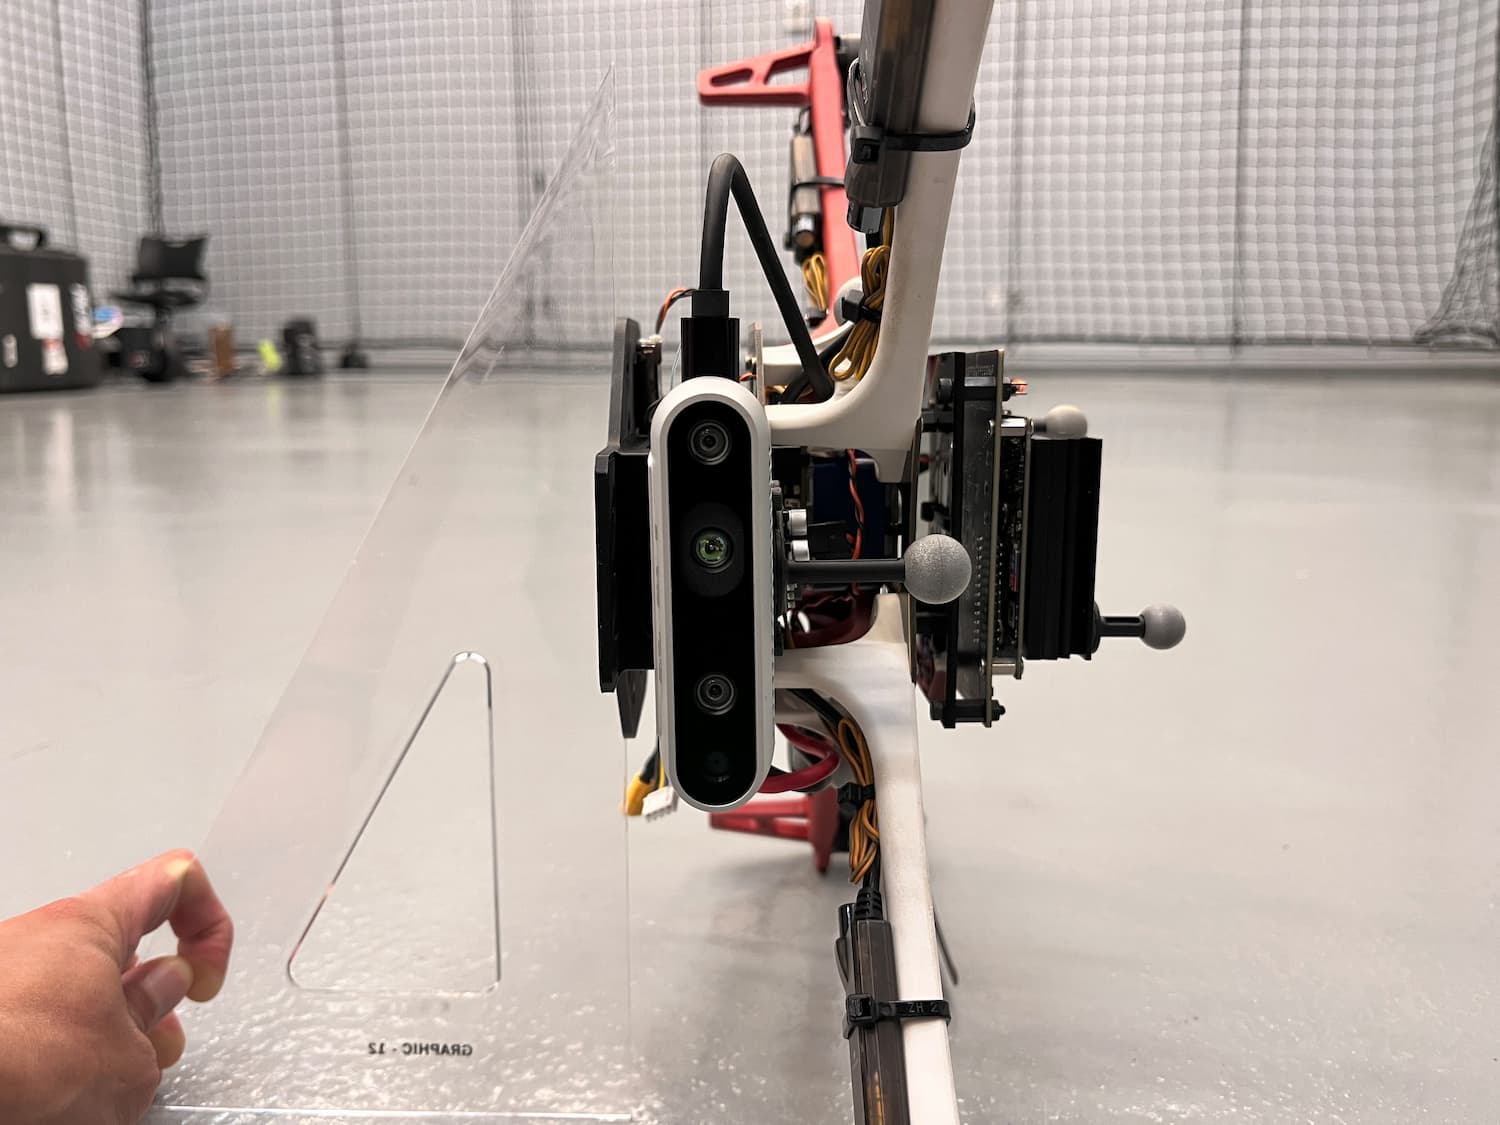
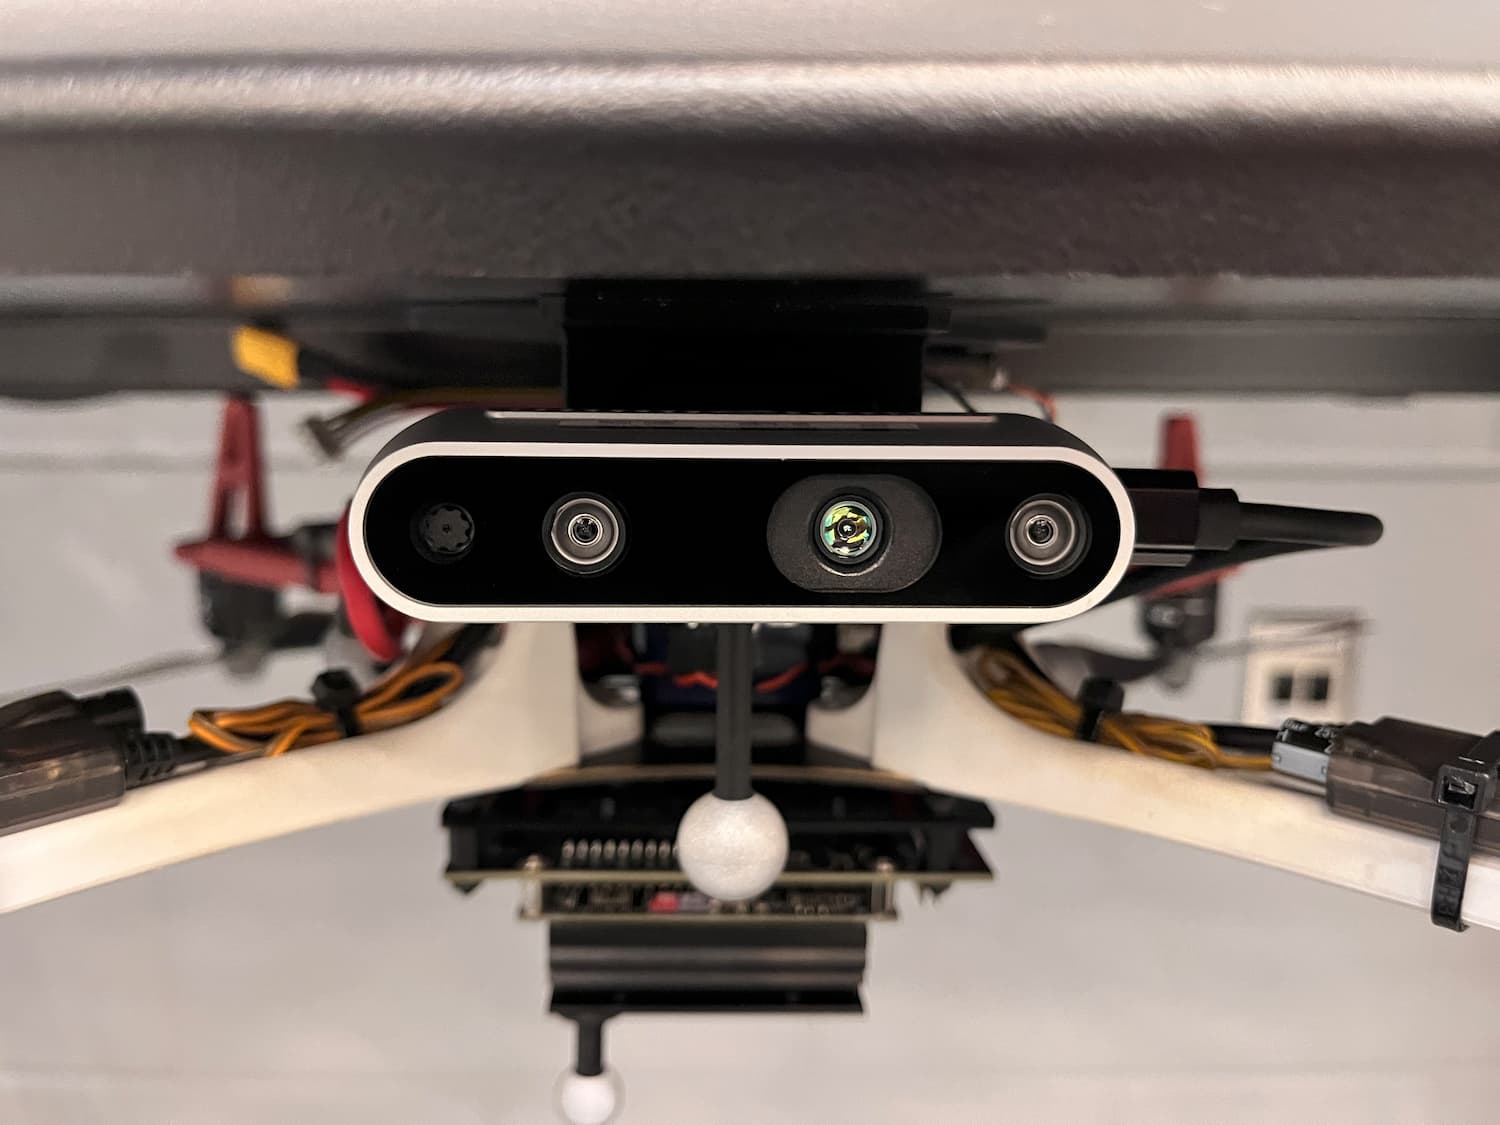
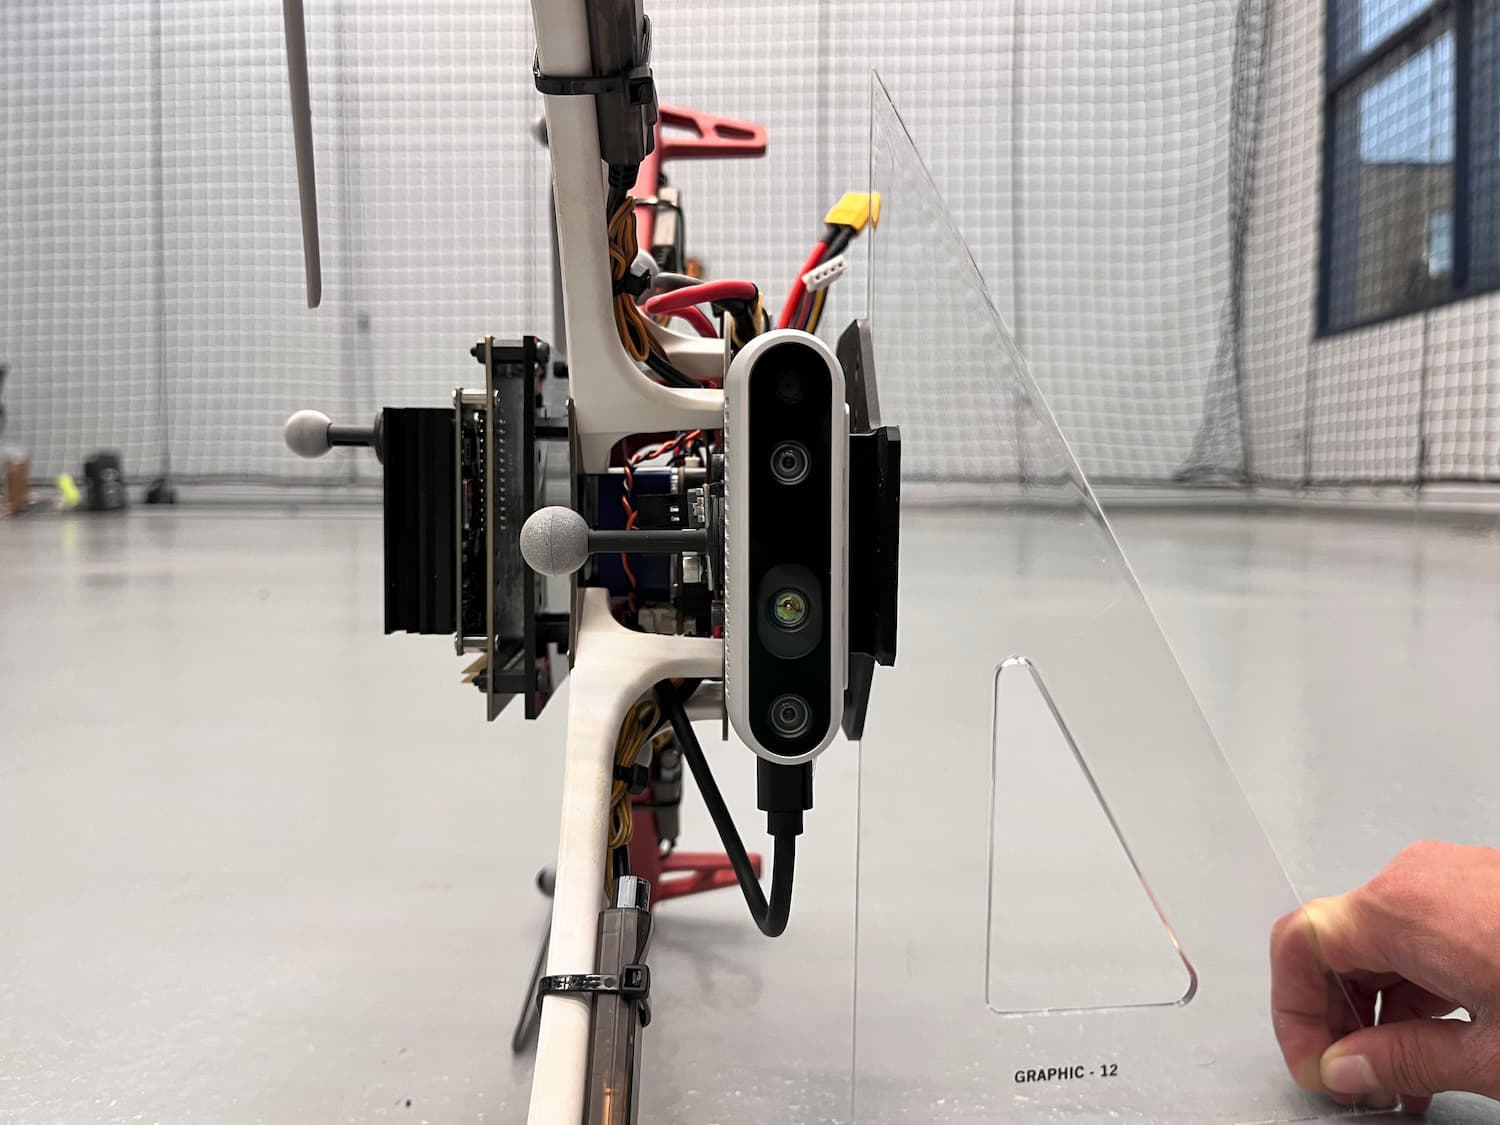
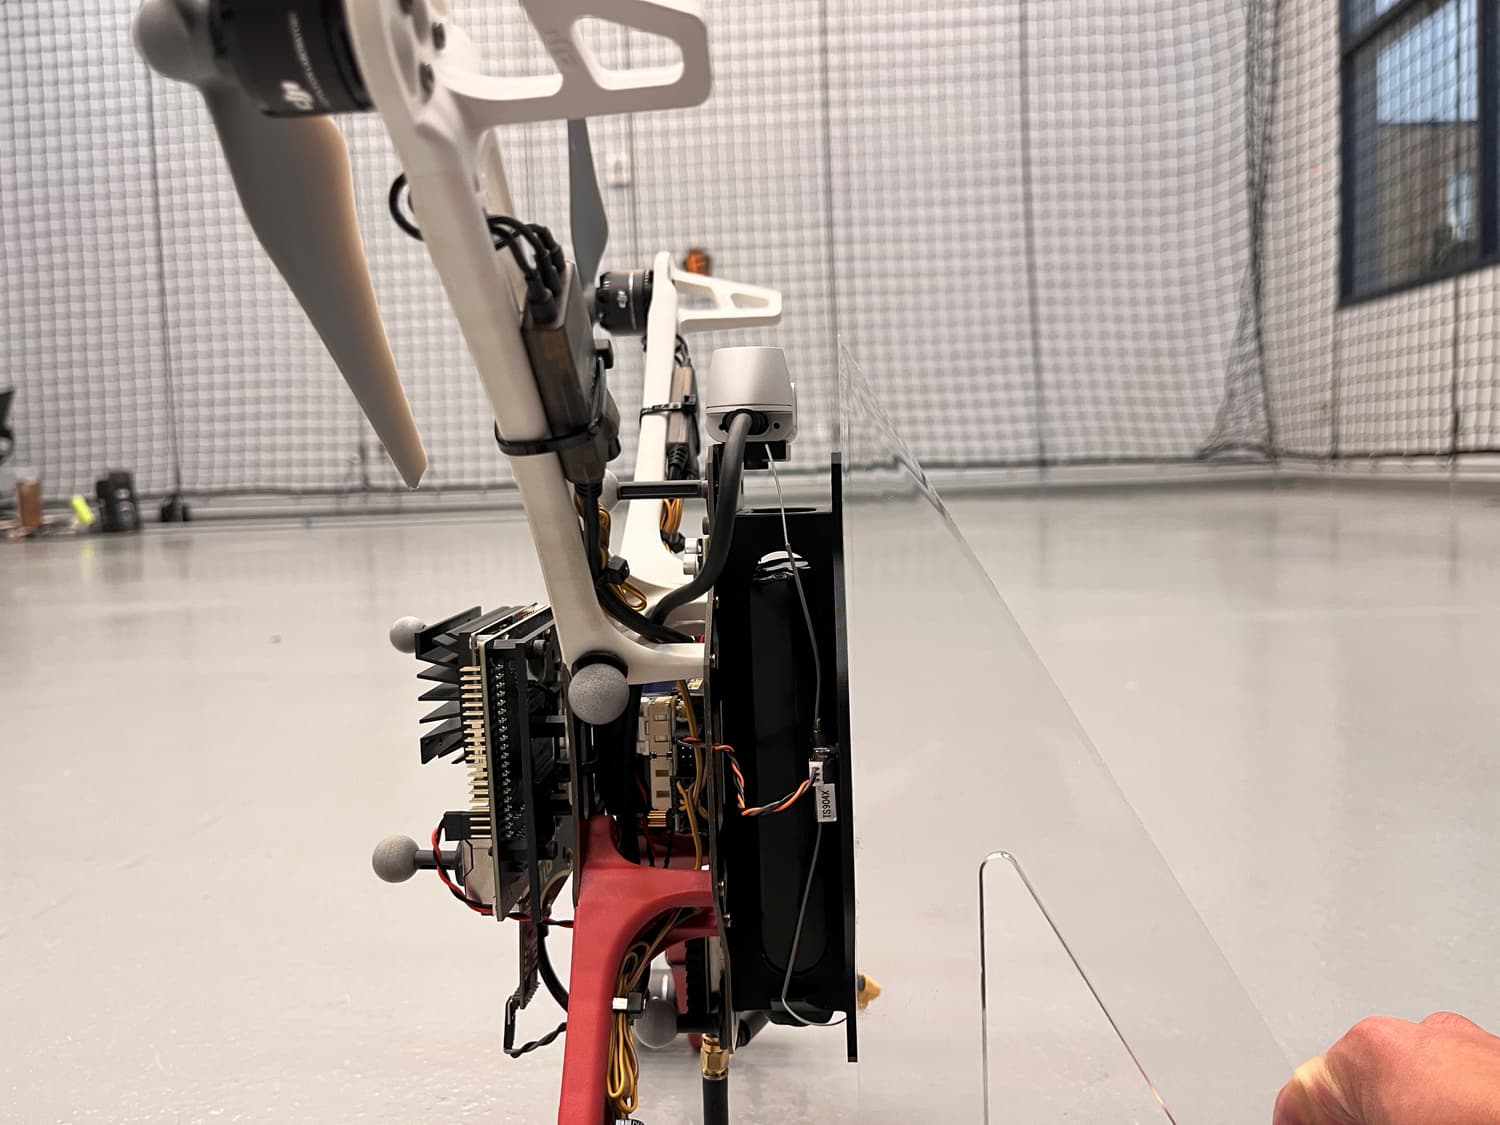
Make sure to plug in the D435i camera to the Jetson Orin Nano via USB.
The Jetson Orin Nano also requires a separate 7-20V power supply with a max power consumption of 36W. The power supply should be connected to the Jetson Orin Nano's barrel jack or USB-C port as seen below:
Software Setup
Confirm that you have installed the correct version of Jetpack by running the following command:
$ cat /etc/nv_tegra_release
Confirm that the output has the terms R36 (release), REVISION: 4.3 which indicates that you are running Jetpack 6.2.
Next, set the GPU and CPU clock to max:
$ sudo /usr/bin/jetson_clocks
Then, run the following command to set the to power to MAXN SUPER mode:
$ sudo /usr/sbin/nvpmodel -m 2
JetPack comes with Docker pre-installed. However, you need to add your user to the docker group in order to run Docker commands without sudo. Run the following command:
$ sudo usermod -aG docker $USER
$ newgrp docker
SSD Setup
An SSD is required for the Jetson Orin Nano to store container images and rosbag files.
Follow the steps below to install the SSD on the Jetson Orin Nano:
- Power Off the Jetson: Unplug the power supply and any peripherals from the Jetson developer kit.
- Install the SSD: Physically install the NVMe SSD card on the carrier board of your Jetson developer kit. Ensure that the connector is properly seated and secure it with the screw.
- Reconnect Peripherals: Reconnect any peripherals you had previously unplugged.
- Power On the Jetson: Reconnect the power supply to turn on the Jetson developer kit.
Once the system is up, verify that your Jetson identifies a new memory controller on the PCI bus by running the following command:
$ lspci
You should see a line similar to the following:
0004:01:00.0 Non-Volatile memory controller: Sandisk Corp Device 5041 (rev 01)
To format the SSD, start by checking the device name of the SSD. Run the following command:
$ lsblk
Identify a new device listed corresponding to your SSD, typically as nvme0n1.
Next, format the SSD with the ext4 filesystem. Replace nvme0n1 with the actual device name of your SSD:
$ sudo mkfs.ext4 /dev/nvme0n1
Mount the SSD to a directory /ssd:
$ sudo mkdir /ssd
$ sudo mount /dev/nvme0n1 /ssd
To ensure the SSD mounts automatically on boot, add an entry to the /etc/fstab file.
First, get the UUID of the SSD:
$ lsblk -f
Find the line corresponding to your SSD and note the UUID.
Next, add the SSD to the /etc/fstab file replacing <UUID> with the actual UUID of your SSD:
$ echo 'UUID=<UUID> /ssd ext4 defaults 0 2' | sudo tee -a /etc/fstab > /dev/null
Finally, change the ownership of the /ssd directory.
$ sudo chown ${USER}:${USER} /ssd
Now that the SSD is mounted, migrate the Docker data directory to the SSD.
Start by stopping the Docker service:
$ sudo systemctl stop docker
Next, move the Docker data directory to the SSD:
$ sudo du -csh /var/lib/docker/ && \
  sudo mkdir /ssd/docker && \
  sudo rsync -axPS /var/lib/docker/ /ssd/docker/ && \
  sudo du -csh  /ssd/docker/
Modify the Docker service configuration to point to the new location of the Docker data directory:
$ echo '{"runtimes":{"nvidia":{"path":"nvidia-container-runtime","runtimeArgs":[]}},"default-runtime":"nvidia","data-root":"/ssd/docker"}' | sudo tee /etc/docker/daemon.json > /dev/null
Rename the old Docker data directory:
$ sudo mv /var/lib/docker /var/lib/docker.old
Finally, restart the Docker service:
$ sudo systemctl daemon-reload && \
  sudo systemctl restart docker && \
  sudo journalctl -u docker
Isaac ROS Setup
VSLAM UAV uses the Isaac ROS framework for VSLAM. This framework is built on top of ROS2 and provides a set of tools and libraries for building robotics applications.
Start by installing Git-LFS and other dependencies:
$ sudo apt install git-lfs
$ git lfs install --skip-repo
$ sudo apt-get install -y curl jq tar
Then, create a workspace for Isaac ROS:
$ mkdir -p /ssd/workspaces/isaac_ros-dev/src
$ echo "export ISAAC_ROS_WS=/ssd/workspaces/isaac_ros-dev/" >> ~/.bashrc
$ source ~/.bashrc
Next, clone the Isaac ROS repository:
$ cd ${ISAAC_ROS_WS}/src
$ git clone -b release-3.2 https://github.com/NVIDIA-ISAAC-ROS/isaac_ros_common.git isaac_ros_common
Configure the Isaac ROS Docker image for the RealSense camera:
$ cd ${ISAAC_ROS_WS}/src/isaac_ros_common/scripts && \
  touch .isaac_ros_common-config && \
  echo CONFIG_IMAGE_KEY=ros2_humble.realsense > .isaac_ros_common-config
Generate CDI Spec for GPU:
$ sudo nvidia-ctk cdi generate --mode=csv --output=/etc/cdi/nvidia.yaml
Clone the VSLAM-UAV repository and download the required assets:
$ cd ${ISAAC_ROS_WS}
$ git clone https://github.com/bandofpv/VSLAM-UAV.git
$ ${ISAAC_ROS_WS}/VSLAM-UAV/vslam/setup/isaac_vslam_assets.sh
Make sure your RealSense camera is connected to the Jetson Orin and run the following command to build the Isaac ROS docker image:
$ cd ${ISAAC_ROS_WS}/src/isaac_ros_common && \
  ./scripts/run_dev.sh -d ${ISAAC_ROS_WS}
It is required to use RealSense firmware version 5.13.0.50. Any other version may not work with the Isaac ROS Docker image.
Once the image is built and running, you can test the RealSense camera by running the following command:
$ realsense-viewer
This should open the RealSense viewer and display the camera feed.
If your RealSense camera is not detected, you may need to run the following commands to update the udev rules in a separate terminal:
$ sudo apt install v4l-utils -y
$ cd ~
$ git clone https://github.com/IntelRealSense/librealsense.git
$ cd ~/librealsense
$ ./scripts/setup_udev_rules.sh
Camera IMU Setup
IMU Calibration (Optional)
In order to best take advantage of VSLAM, you must incorporate IMU data into the VSLAM pipeline. You can use the built in IMU of the Intel D435i camera. The IMU comes pre-calibrated from the factory, but it is recommended to calibrate the IMU to ensure accurate measurements.
To calibrate the IMU, you can use the IMU Calibration tool that comes with Librealsense. First, you need to build the realsense docker image:
note: installed librealesnes git to workspace
$ cd ~/VSLAM-UAV/docker/realsense
$ ./run_docker.sh
This will build the image and run it in a container. Once the container is running, you can run the IMU calibration tool:
$ cd ~/librealsense/tools/rs-imu-calibration
$ python3 rs-imu-calibration.py
Simply follow the command line instructions to calibrate the IMU. Below are images of the calibration process to help guide you through the process.
Position 1: Upright facing out

Position 2: USB cable up facing out
Position 3: Upside down facing out
Position 4: USB cable pointed down
Position 5: Viewing direction facing down

Position 6: Viewing direction facing up
Make sure you write the calibration results to the camera's eeprom.
IMU Parameter Estimation
With the internal IMU calibrated, you need to estimate the parameters of the IMU. The parameters of the IMU are the accelerometer and gyroscope noise and bias instability. You can estimate these parameters by collecting data from the IMU and using Allan Variance to estimate the parameters.
First, you need to record static data from the IMU for an extended period of time (at least 3 hours). Open the Isaac ROS Realsense Docker container and run the realsense node to start streaming data from the camera:
$ cd ${ISAAC_ROS_WS}/src/isaac_ros_common && ./scripts/run_dev.sh -b
$ ${ISAAC_ROS_WS}/VSLAM-UAV/vslam/setup/realsense_node.sh
This will open up the realsense ros node. Next, open up a new terminal and attach to the container:
$ cd ${ISAAC_ROS_WS}/src/isaac_ros_common && ./scripts/run_dev.sh
In the attached container, run the following command to record IMU data:
$ cd ~
$ ros2 bag record -o imu_rosbag /camera/imu
After at least 3 hours, stop the recording with CTRL+C.
Go to the terminal running the realsense-node.sh script and stop the realsense ros node with CTRL+C.
With our IMU data, you can now proceed to estimate the IMU parameters. This can be done easily within the ROS2 framework via allan_ros2.
First, you need to clone the VSLAM-UAV repository on your desktop computer:
$ cd ~
$ git clone https://github.com/bandofpv/VSLAM-UAV.git
Next, you need to copy the IMU data to your desktop computer.
Start by copying the IMU rosbag file from the docker container to the Jetson Orin Nano's home directory. In a new terminal on the Jetson Orin Nano, run the following command:
$ docker cp $(docker ps -q --filter ancestor=isaac_ros_dev-aarch64):/home/admin/imu_rosbag ~
Open a new terminal on your desktop computer and run the following command:
$ scp <username>@<jetson_ip>:/home/<username>/imu_rosbag ~/VSLAM-UAV/docker/analysis
Where <username> is your username on the jetson and <jetson_ip> is the IP address.
Next, you need to build the analysis docker image on your desktop computer:
$ cd ~/VSLAM-UAV/docker/analysis
$ ./run_docker.sh
This will build the image and run it in a container. Once the container is running, you must modify the configuration to point to the IMU rosbag file. Simply run the following command:
$ ~/VSLAM-UAV/vslam/setup/allan_config.sh
Next, run allan_node to compute the raw deviation values:
$ ros2 launch allan_ros2 allan_node.py
After you get the DONE message, exit via CTRL+C and run the analysis.py script to compute the IMU parameters:
$ python3 ~/ros2_ws/src/allan_ros2/scripts/analysis.py --data deviation.csv
This will output the IMU parameters and save them to the imu.yaml file.
Now, we can use these parameters in the VSLAM pipeline. In a new terminal on the Jetson Orin Nano, modify the isaac_ros_vslam_realsense.py script to include the IMU parameters. Open the script in a text editor:
$ nano ${ISAAC_ROS_WS}/VSLAM-UAV/vslam/isaac_ros_vslam_realsense.py
Update the gyro_noise_density, gyro_random_walk, accel_noise_density, and accel_random_walk parameters with the values from the imu.yaml file you generated earlier.
Flight Controller Setup
PX4 Parameters
Assuming you have installed the latest PX4 firmware (v1.15.4), change the following parameters in QGroundControl to enable the companion computer to communicate with the flight controller via the TELEM2 port:
 MAV_1_CONFIG = TELEM2
 UXRCE_DDS_CFG = 0
 SER_TEL2_BAUD = 921600
Additionally, to enable use of vision pose estimation without GPS, you must set the following PX4 parameters:
EKF2_HGT_REF = Vision
EKF2_EV_DELAY = 50.0ms
EKF2_GPS_CTRL = 0
EKF2_BARO_CTRL = Disabled
EKF2_RNG_CTRL = Disable range fusion
EKF2_REQ_NSATS = 5
MAV_USEHILGPS = Enabled
EKF2_MAG_TYPE = None
Test Connection
MAVLink is the default and stable communication interface for working with PX4.
You can test that the Jetson Orin Nano and flight controller are communicating with each other via a MAVLink GCS called MAVProxy.
Run this command on your Jetson Orin Nano to add your user to the dialout group:
$ sudo adduser ${USER} dialout
Then, reboot the Jetson Orin Nano to apply the changes.
You can check that the serial port is available by issuing this command:
$ ls /dev/ttyUSB0
The result of the command should include the RX/TX connection /dev/ttyUSB0
Next, install MAVProxy:
$ sudo apt install -y python3-pip
$ sudo pip3 install mavproxy
$ sudo apt remove -y modemmanager
Run MAVProxy, setting the port to connect to /dev/ttyUSB0 and the baud rate to match the flight controller (921600):
$ sudo mavproxy.py --master=/dev/ttyUSB0 --baudrate 921600
MAVProxy on the Jetson Orin Nano should now connect to the PX4 flight controller via its RX/TX pins. CTRL+C to exit.